Orb Knob
Orb Knob
Couldn't load pickup availability
Share
Overview
Overview
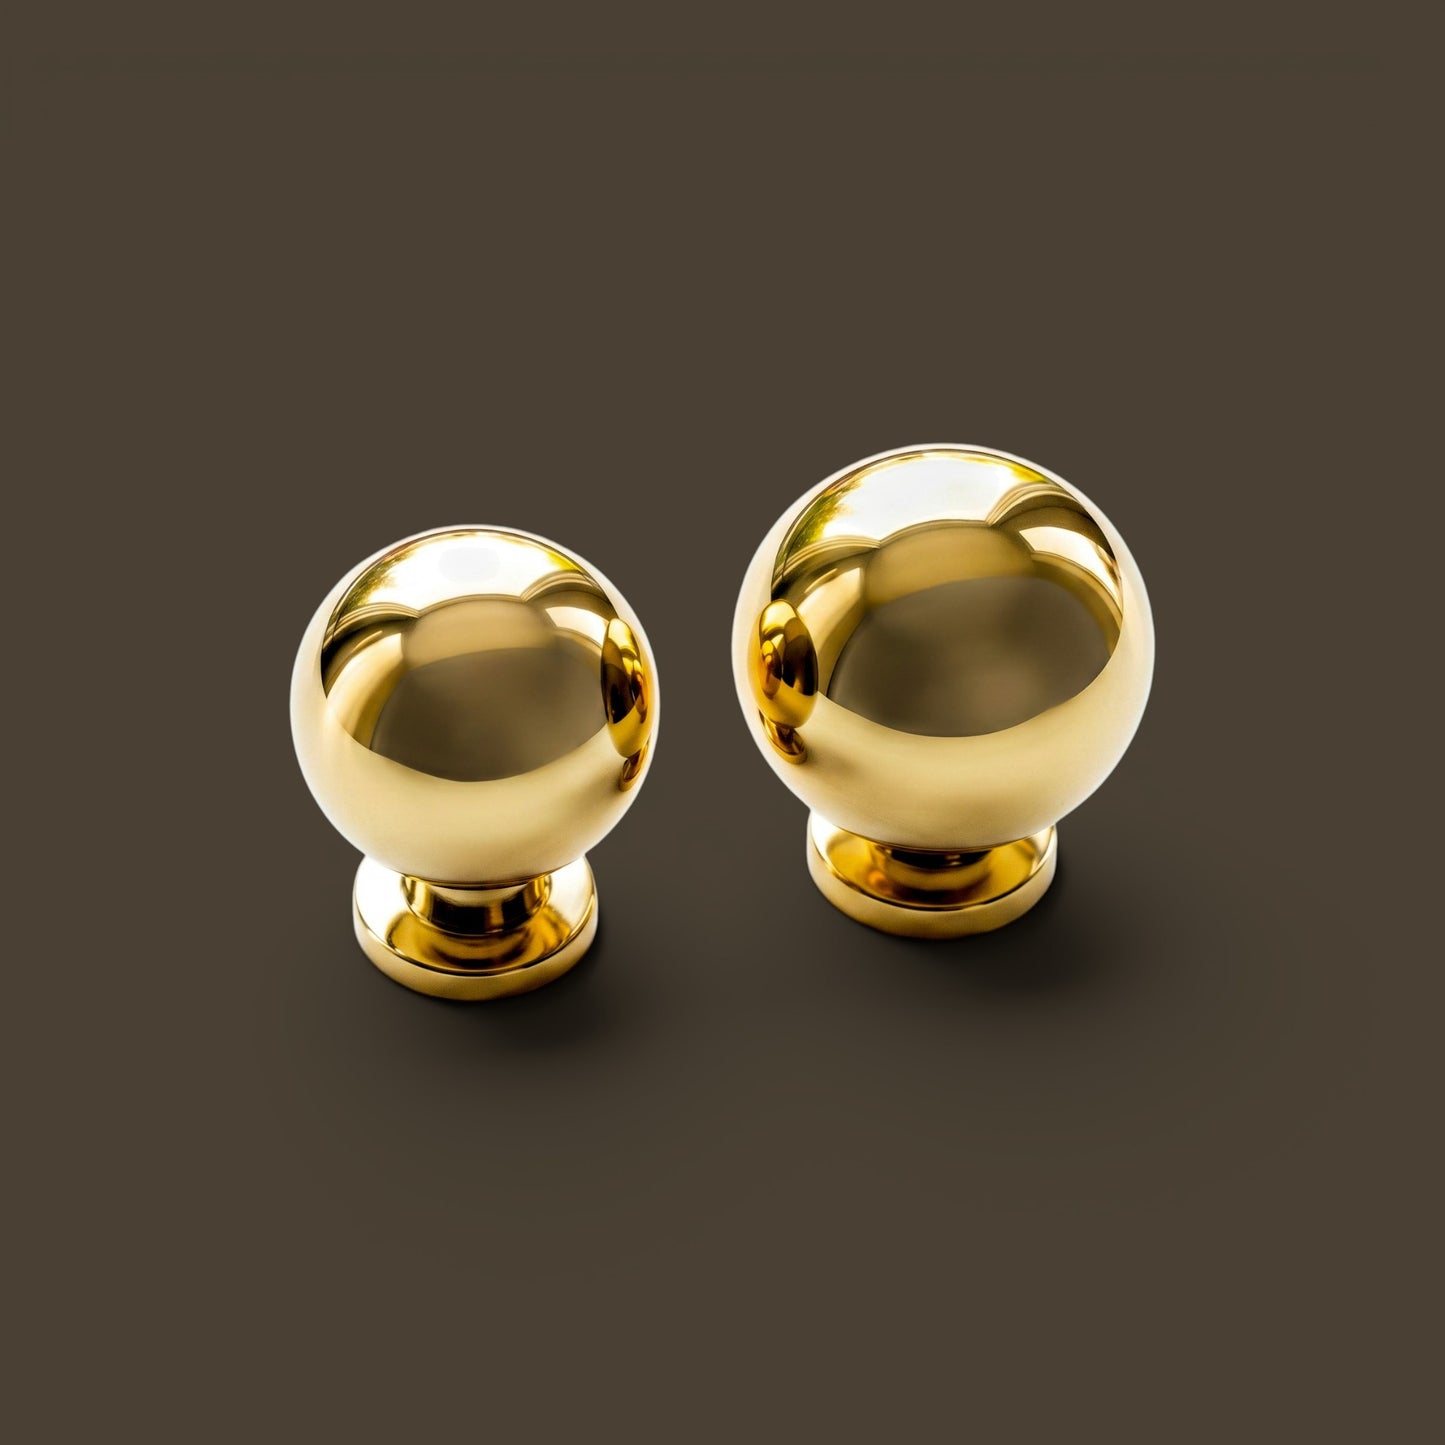
The Orb Knob represents the ultimate in classical form. Pure, balanced, and perfectly spherical, this piece is inspired by the timeless geometry found in ancient architecture and astronomy. Its absolute simplicity allows the natural weight and luster of solid brass to take center stage, making it a powerful statement of enduring beauty.
Key Design Specifics:
• Heirloom Quality: 100% Solid Brass. This is perhaps our most satisfyingly heavy knob, designed to feel like a steadfast and permanent fixture of your home from day one.
• The Absolute Sphere: A precision-cast, perfectly round silhouette that offers a powerful, intuitive grip and a look of disciplined elegance.
• Architectural Fit: Universally suited for everything from Shaker-style kitchens to neoclassical furniture and minimalist modern cabinetry.
Dimensions
Dimensions
Orb Knob (Small):
Width: 1"
Projection: 1-3/16"
Base: 5/8" Dia
Orb Knob (Standard):
Width: 1-1/16"
Projection: 1-1/4"
Base: 5/8" Dia
Care and Maintenance
Care and Maintenance
Daily Care
- Routine Cleaning: Dust frequently with a clean, soft, lint-free dry cloth.
- Spills: Wipe spills immediately with a clean, damp cloth and dry thoroughly.
- Avoid Abrasives: To protect the integrity of the finish, do not use chemical cleaners, abrasive sponges, harsh materials, or furniture polishes.
Finish-Specific Care
- Unlacquered Brass (Living Finish): This finish is designed to age. Embrace the natural oxidation and patina that develops over time. To maintain the patina, simply wipe with a soft, dry cloth. If you prefer to restore the original luster, a gentle brass cleaner may be used.
- Polished Nickel: Clean with a soft, damp cloth and dry immediately. Avoid all harsh chemicals to protect the integrity of the plating.
Installation & Long-term Care
- Atelier Tip: Because Unlacquered Brass is sensitive to natural skin oils, we recommend using clean hands or soft cotton gloves during installation to ensure an even start to the patination journey.
- Maintenance: Hardware may loosen with heavy use. Periodically check all connections and tighten with a manual screwdriver if necessary.
CALIFORNIA PROPOSITION 65 WARNING: This product can expose you to chemicals including lead, which is known to the State of California to cause cancer and birth defects or other reproductive harm. For more information, go to www.P65Warnings.ca.gov.
Shipping & Return
Shipping & Return
We take pride in the artisanal quality of our solid brass hardware. Because our products feature living finishes that begin to age upon contact, we have established clear guidelines for returns.
• 30-Day Returns: Eligible items in new, uninstalled condition can be returned within 30 days of delivery. A 20% restocking fee applies, and original shipping charges are non-refundable.
• Living Finishes: Please note that Unlacquered Brass items cannot be returned once the packaging has been opened, as the aging process begins immediately. We strongly recommend ordering a sample before placing a large order.
• Final Sale: Custom orders and items marked as Final Sale are not eligible for return.
For complete details, please read our full Return Policy.
Installation Guide
Installation Guide
Specifications & Parts Included
Our hardware includes a versatile fastener kit designed to accommodate standard cabinetry thicknesses.
Included Parts:
Standard Pulls:
- Solid Brass Pull/Knob
- #8-32, 1" Truss Head Machine Screws
- #8-32, 1-3/4" Truss Head Breakaway Machine Screws
Appliance Pulls:
- Solid Brass Pull/Knob
- #1/4-20 1/2" Flat Head Machine Screws
- #1/4-20 3/4" Flat Head Machine Screws
- #1/4-20 1" Flat Head Machine Screws
- #1/4-20 1-1/4" Flat Head Machine Screws
- #1/4-20 1-3/4" Flat Head Machine Screws
Tools Required (Not included): Pencil, Power Drill with a 3/16" drill bit (9/32" drill bit for appliance pulls), Phillips head screwdriver.
Mounting Instructions
- Placement: Determine the desired location for the hardware on your cabinet door or drawer front.
- Drilling: Using the center-to-center measurements of your specific Pull, mark the hole locations. Drill through the door/drawer using appropriate drill bit.
- Screw Selection: Select the screw length appropriate for your cabinetry thickness.
- Assembly: Insert the screws through the back of the door/drawer and align them with the threaded holes in the pull.
- Securing: Hold the pull steady and tighten the screws using a manual Phillips screwdriver until snug. Do not over-tighten to avoid stripping the brass threads.